Tuesday, August 9, 2011

The Joys of Winston...

So this is going to be a quick one...I'm a little aggravated. But I guess I brought this on myself.

About a week ago I joined the addicting world of Pinterest. And one of the blogs I follow is doing a Pinterest Challenge. I thought, "I could do that!" Well not as fast as them but why not find something I like, then do it. Finally put things on our bare walls. I came across this picture in the DIY section and decided I had to do it.


So I ran to JoAnns got an "E" and figured I could use some left over jute that I had laying around. Oh an "E" you ask? One day while thrift store hopping we found a "R" and thought how fun it'd be if we had all the letters of our last name scattered throughout the house. So that's why I got the "E". I got home and was testing different ways to wrap it and finally found one that worked. All in all it probably took me 30 minutes or less and a burnt leg. Stupid hot glue gun. Here she is...


So cute! Now we didn't put it up because we weren't sure where it was going so we put it on the kitchen counter, right up against the wall, where a certain dog would clearly have a hard time reaching. I'm sure all of you who know Winston, know where I'm going with this. When we got home tonight I was welcomed with this..


That's just the jute...we aren't sure where the "E" went. His belly I'm sure. We were just amazed by the fact that he worked really hard to get the jute off and he only ate the "E", oh and a empty box of pop tarts. He never seizes to amaze me. Now I get to go and do that all over again..Here is how the trouble maker looks now..


jo

Monday, August 1, 2011

8 Months Later, We Finally Have A Bed!!

Well since I'm stuck at the Denver airport, I figured I could update. It's a little lengthy so I apologize now!

We've been busy working on our bedroom. We painted and finally painted our dresser but I'll get to that later this week. We also built our bed. Thank you ana-white.com. Well sort of.

We originally wanted an old door for a head board and actually got an AMAZING door from a friend. The only problem was that it had been outside in the rain and had bugs crawling all over it. No matter what Tim did to clean it, they seemed to come back. He even tried to start stripping it but it probably has about 6 or more layers of paint on it. We figured once we got it completely stripped, cleaned, de-bugged, and sanded it'd be about a month or so before it was ready to be painted/stained and we were becoming impatient. We also thought about doing a reclaimed barn wood headboard. There's a barn close to us and we seriously thought about going in there and taking some wood. But we weren't sure how we'd get the wood (since the wood we liked is still an actual part of the barn) and how bad it'd smell when it got hot. Nothing more romantic than a poop smelling headboard. So we went with the whole buying new wood and beating the crap out of it route. And we are happy we did!

Before we actually built the bed I wanted to have our night stands so we knew how tall the bed needed to be. We bought old crates from an antique store and added a small piece of wood in the center for a shelf. We finally had an idea of the bed we wanted, our night stands, and the money to buy the wood. So lets get to building!

First we built the base of the bed, like where our mattress actually lays. We took a few 2 by 4's and built it out and then screwed some plywood down to support the mattress. I actually did a lot more cutting this time around. After we built that we took that up to our room and put the mattress on it. I put an old sheet down before the mattress so the plywood wouldn't snag the mattress.


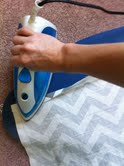
We then made the last few cuts we needed and stained the pieces. We did this because we had to build the bed in our room and we didn't want to worry about having stain dripping on the carpet. We had some left over stain from our outdoor furniture and since we love it so much, we just used it. As for the headboard, before we stained it we took a chain, hammer, mallet, hand saw, and screws and took any anger out on the wood. We laid the screws down and hit it with the mallet or hammer and banged the chain and hand saw all over it. It was kind of dangerous but it was a lot of fun.


After letting the stain dry we took the pieces up to our room and built that bad boy. We screwed the outer pieces onto the frame, added the front and back legs. Then we put the mattress back on and tested it out...it was a little taller than we thought it was going to be...Winston wasn't too sure about it.


We then added the pieces for the headboard. I had Tim screw the screws into the back because I wanted that clean look. At first we were going to do the boards where they we perfectly lined up but after putting the first one on we decided we wanted to make it look jig-jaggidy.


Here it is! We love it. It's a lot taller than we thought and are still getting used to that. But after having our mattress on the floor for 8 months, anything would feel too tall! Since I took this picture we put our new comforter on it but until I get the rest of the stuff for it this bad picture will have to do!


jo

Sunday, July 24, 2011

Window Decision!

Well we made a decision with the back door! Thank you for your ideas! We ended up getting roman shades. I looked at all the different was to make my own and went to price them out at Lowes and we ended up just buying them at Lowes. What can I say, sometimes we are suckers for the easy way out! :) Tim just put them up and it's kind of amazing how cool it already seems to be! I'm sad that we ended up having to cover the wonderful light...but we can always pull them up and leave them up when it isn't 105 outside!


Here's Tim making sure that the latches are level.


Ahhh, Much Better!!

These roman shades are the "classic thermal" shades from allen & roth and are just classic white. We didn't want another pattern going on up there so white it was. We really like them, and seriously hope they help with the warmth!

I'll be back soon with what's been going on in our room!

jo

Thursday, July 21, 2011

Window Help!!

So before I update all the amaziness from our room, we need some help!

In the afternoon hours, our upstairs gets really freaking hot! And not to mention our electric bill is getting out of control!! First order of business is I'm going to line our curtains with a thermal liner. Now why we are needing your help. Our back door has been curtainless/blindless since we moved in and we have always liked it like that. And with the weather being so hot we are now faced with needing to put something up. I want curtains (probably plain ol'white) because personally I'm over blinds and I'm nervous that this sweet face will ruin them like he usually does.


But Tim wants pull down blinds something like these..


He thinks that with all the curtains upstairs being closed the wall will look like one big curtain and he doesn't want to cover up the molding. Just to refresh your memory's, here's the back door and the other wall this the curtains closed..


Ok..please help us!! Thanks!!

jo

Wednesday, July 6, 2011

Outdoor Furniture-Part 2!!

I'm back to show you the end results of the outdoor furniture!

So we built 4 of the chairs from ana-white.com and then we got a little crazy and built somethings on our own. We made a love seat, coffee table and a little end table. We basically took the same concept of the chair but made it bigger. And the tables...Tim just whipped those together one day when I was at work. I guess you can say we are really into building our own furniture now! Our next big build will be our bed!! Woo-Hoo!! I'm beyond excited for that day! More on that on a later date!!

Our next step was picking out the stain color. We wanted something on the dark side but we still wanted to see the wood. I can't remember the name of the stain...hold on..Oxford Brown from I believe Lowe's. And to be honest...there's a good chance that that isn't the real color. The paint guy, let me re-phrase that, The paint KID had no idea what he was doing! We stood back there and watched him guess what he was doing for about 20 minutes, but whatever he did we love!


All we did with the stain was, coat a piece of wood and then wipe it down. Note to self: Don't listen to your sweet husband and wear gloves. :) I was COVERED in stain!! Ok I'll stop rambling and get to the goods!


So here's the deck before...


AND AFTER!! The cushions we got at Target for $10 a piece and those pillows are just pillows from around the house. I'm waiting until outdoor fabric goes on sale.


So we also bought little planter holder things from Lowe's to hold citronella candles and some cute lantern's Tim made. You can kind of see them in the first "after" picture. All he did was, took a mason jar and some small wire and wrapped that around a few times and then made a loop. Filled it with sand from our sand bow (yea, we have a sand box..) and then we put a candle in it. Also we hung some old christmas lights up until we buy some lights that are a little bigger. Some time soon we will get a picture of all this at night so you can see what "Twinkle Time" looks like. Yup we named it.

We love the end results and how beyond easy it was. And all in all I bet it took us 2 full days start to finish. We did it in about week all spread out. I hope this inspires you guys to build something!! And I promise to post a picture of how looks at night! :)

jo

Sunday, July 3, 2011

Outdoor Furniture-Part 1!

Well we've been busy this past month! I've been meaning to update but just having really had the time!

So it all starts back a few months. When the weather started getting nice, we decided to go outdoor furniture hunting and lord it was all so expensive! It's kind of ridiculous how expensive some of the stuff is out there. That got me thinking, why can't we just make our own? Some friends from church told us about a website called ana-white.com, so I went and checked it out. This girl builds everything, including outdoor furniture! After searching through the different options we decided we wanted to do a sectional. We liked that it was a little different than the usual stuff out there and the chairs were moveable so if you didn't want to sit close to someone you could move your chair. We went to Lowe's and priced it all out and figured out it was going to cost maybe $200 to build it all and get/make cushions. Um yes please! We decided to build one and make sure that we could actually do it.


Here's Tim picking out wood.


I learned that warped wood is bad and that more than half the pile is full of warped wood.


This is what I do at Lowe's...that thing spins...it's awesome!


Tim measuring the wood.


And cutting it. (Now with our first chair we really used a hand saw. After some uneven cuts we borrowed our Pastors table saw thing, it went a lot faster and smoother after that)


I'm a little OCD and had to put the cuts from largest to smallest, weird I know. Oh yea..wear shoes when working with nails and wood and power tools.

And here would be all the pictures of us building this bad boy but I didn't take any pictures during the build...or during any of the builds. Whoops. You can see the step by step process on ana-white.com :)


And here he is in all his glory. We actually built this!!

We ended up building the rest but I'll save that for later this week!!

Wednesday, June 1, 2011

No Sew Curtains!

I realized that way back when, I didn't show you all how I made the no sew curtains. It's so easy! When we were thinking about our downstairs doors, we didn't want to do those annoying vertical blinds. We had those at our old house and honestly I wanted to set them on fire! :) I wanted to make sure that it was bright enough during the day, but not too bright for when Tim is editing. And I wanted them to give us privacy at night. The backyard at night creeps me out so I had to make sure they covered the doors.

I wanted the fabric to be more on the neutral side. That way if we ever want to change up the room, they should match. Not gonna lie, I've been in love with the new zig zag fabric that is out there. At first I wanted the green and white zig zag but figured i have enough green and that wasn't all that neutral. So I went with the gray and white. I found it on I believe buyfabrics.com for only $6 something a yard..that's amazing! The plan was to use black out fabric behind it but I was worried I'd mess it up if I had to sew. So here's what I did.

First I washed the fabric and after it was dry i figured out what was half and cut it. I didn't wash them last time and the upstairs curtains are a little stiff. After that I busted out the no sew tape and went to town. All you do is cut the tape the same length as the side you're doing, fold it over the same width as the tape and then hold the iron on the spot, no wiggling. I only did a little at a time so I didn't mess it up. I'm a little OCD and I had to do it like this: Top, Bottom, Side, Side on both pieces. You can do it anyway your heart desires, I'm just weird. Obviously after washing them they were wrinkling, so I tried to iron them. I hate ironing! Even though they didn't come out with no wrinkles, we still love them! It gives them a more "we've been here a while" look.


I guess I should mention that I bought the rings with the clips on them. I did this because A. It's the easiest B. Child proof and C. Winston proof. He loves walking in the curtains. Weird. We went with a gun metal finish. At first it was because I didn't want black but then I noticed that our card catalog's handles had the same finish.


What's nice is we can drag them any which way we want! We are in love! I hope that this helps you make your own curtains! It's so stickin easy!!

jo